
 |
|
Creating Large Sublimation Tile Murals Using CorelDrawCreating Tile murals with CorelDraw is easy and is fully explained in this post below. Many people ask me how to make large tile murals using their heat press and dye sublimation tile. Here is a tutorial on making one using 6 inch tiles for a 6 tile mural that is 12″x18″. |
|
 |
Using Photoshop, Corel Paint or any photo editing software, you must first prepare your image to the appropriate size. In this case our mural of a cowboy will be 12×18 (3 – 6″ tiles x 2 – 6″ tiles). I cropped and resized this image to fit our needs. The actual tile size is 6″, so we need to give a little extra “bleed” so that our tile will be fully printed from edge to edge..in this case 6.1″ should do the trick. For a 12″x18″ tile mural, our overall graphic would need to be sized 12.2″x18.3″. |
|
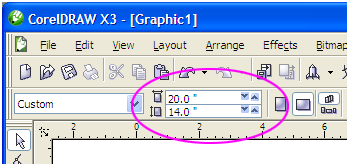
Our first step in Corel Draw is to change our working page size to contain our entire mural. In this example, we will set the size to 14″x20″. |
 |
|
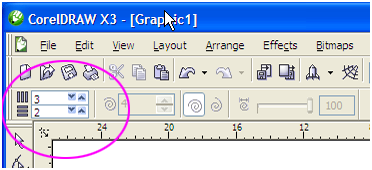
The next step is to create our grid using in Corel Draw what is called the “graph paper tool.” This will create a 3×2 grid as specified in this area here… |
 |
 |
|
|
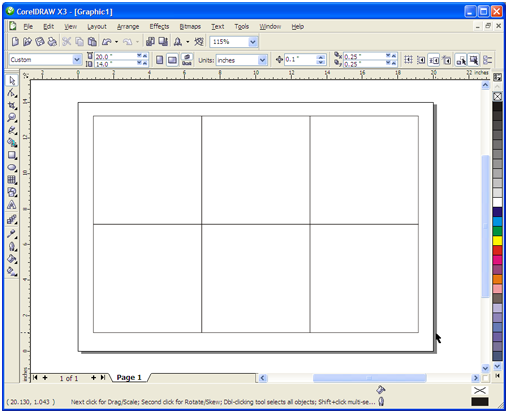
The next step is to create our grid using in Corel Draw what is called the “graph paper tool.” This will create a 3×2 grid as specified in this area here…Using the Graph Paper Tool, click and pull the box into shape. Here below is the result. Notice that the grid boxes are not properly sized. |
|
|
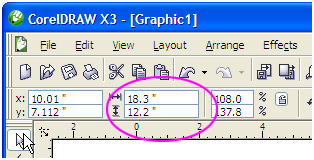
Next, we are going to size our grid by selecting it and changing the size in the property size box here… |
 |
 |
|
|
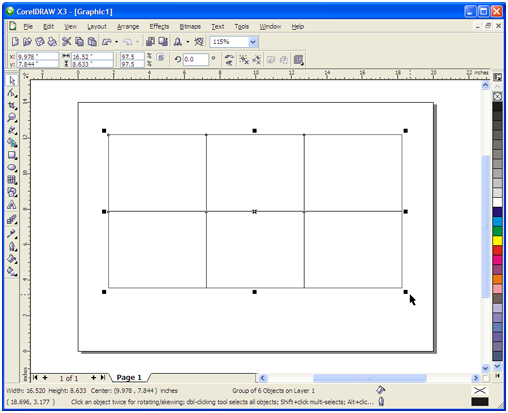
Which will give us a grid of the proper size 12.2″x18.3″, shown below… |
|

It is a great idea at this point to save this template for future use in a template folder on your hard drive. |
|
|
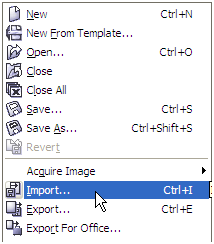
We are now ready to import our image from the File Menu by clicking here… |
 |
 |
|
|
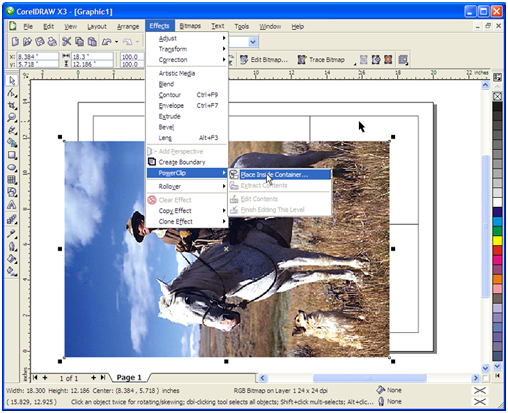
Select your image and now our image now appears. Using our cursor, we choose the imported image and from the Effects Menu, choose PowerClip and then “Place inside the Container.” |
|
 |
|
|
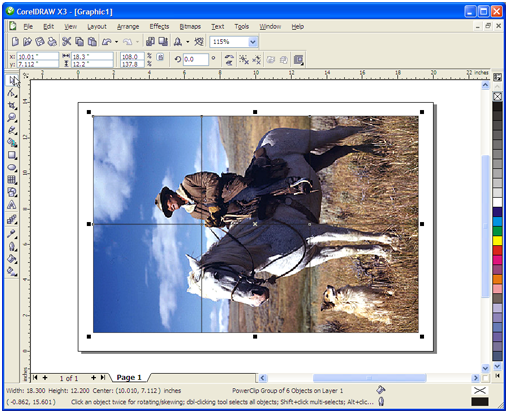
Then click on the grid, which will place our imported image within the grid. It should look like this… |
|
 |
|
|
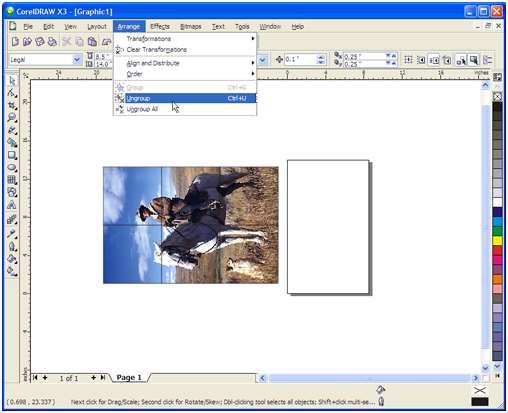
We move our “PowerClipped” Image over to the side and get ready to separate the individual tiles by choosing the Arrange Menu and then “Ungroup.” |
|
 |
|
|
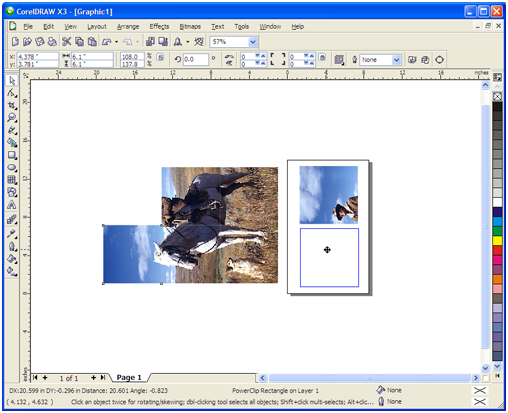
We now resize our page to reflect what kind of paper we will be printing our transfers on. In this example, I am using 8.5″x 14″ known as Legal Size. This will allow me to print two tiles on one page which really maximizes the use of my dye sublimation paper. You may now move your tiles one by one over to the blank page. Add more pages until all your tiles are placed. |
|
|
Congratulations! |
|
